
To install this theme you must have a working version of WordPress. Make sure that your installed WordPress version is 5.7 (or higher).
If you need help by installation of WordPress, follow the instructions in WordPress Codex. Also here you can download the latest version of WordPress.
Download
- Go and log in to our members dashboard.
- Download villar-premium.x.x.x.zip or villar-free.x.x.x.zip from Downloads page.
- Rename your download file to villar.zip (Optionally, the documentation below will use villar.zip to represent the theme your downloaded.)
‘x.x.x’ is the version number, the version number will change as the theme is updated
Installation
You can install this theme in two different ways:
- WordPress Theme Manager (installing from the WordPress Dashboard)
- FTP upload
1. WordPress Theme Manager
1.1 Go to Themes Page
- Step 1. Login to your WordPress admin page.
- Step 2. Navigate to Appearance > Themes.
- Step 3. Click the “Add New” button.
1.2 Upload Theme
Click the “Upload Theme” button.
1.3 Upload Theme ZIP File
- Step 1. Click on the “Choose file” button and select the theme zip file: villar.zip.
- Step 2. Click the “Install Now” button. After that, the process of installing the theme begins.
If at this step you see some error (for example: The uploaded file exceeds the upload_max_filesize directive in php.ini), go to “FTP upload” section.
1.4 Activate Theme
After the installation is complete, click the Activate link.
1.5 Opt-in or Activate License
If you are using the free version, you will see an opt-in screen like this:
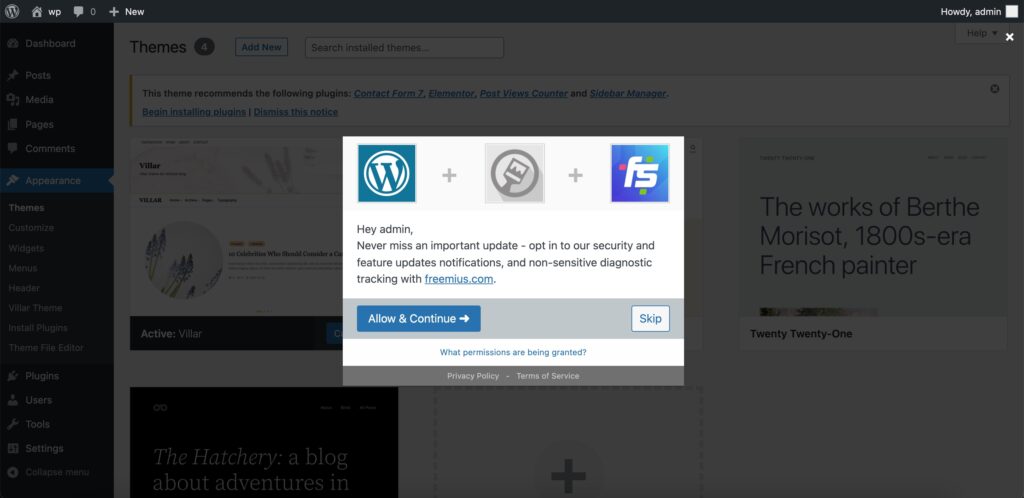
You can choose “Skip” button, but we highly recommend that you choose “Allow & Continue” and create an account to get our security and feature updates notifications.
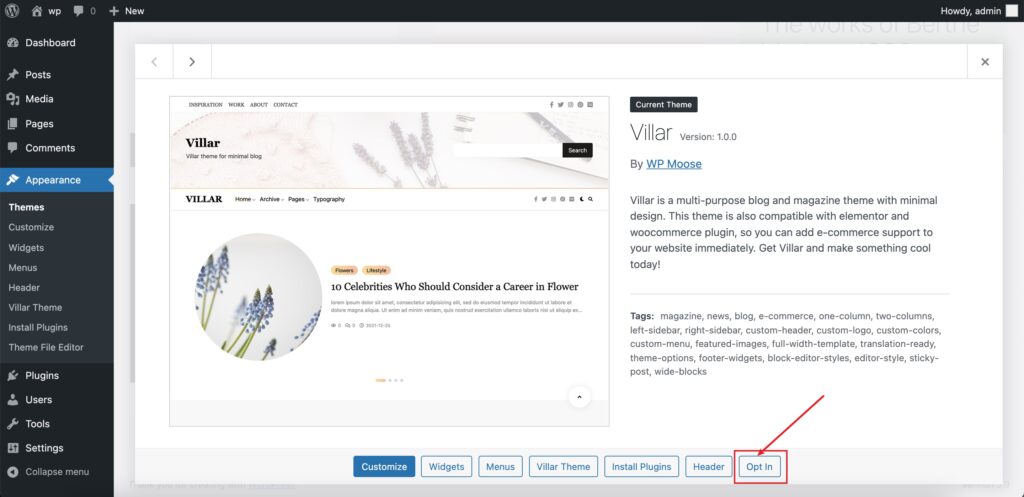
If you skip it now, but want to opt-in again in the future, you can find the opt-in button on the introductory modal of the theme:
If you purchased and downloaded our premium theme, you will be asked to enter your License key.
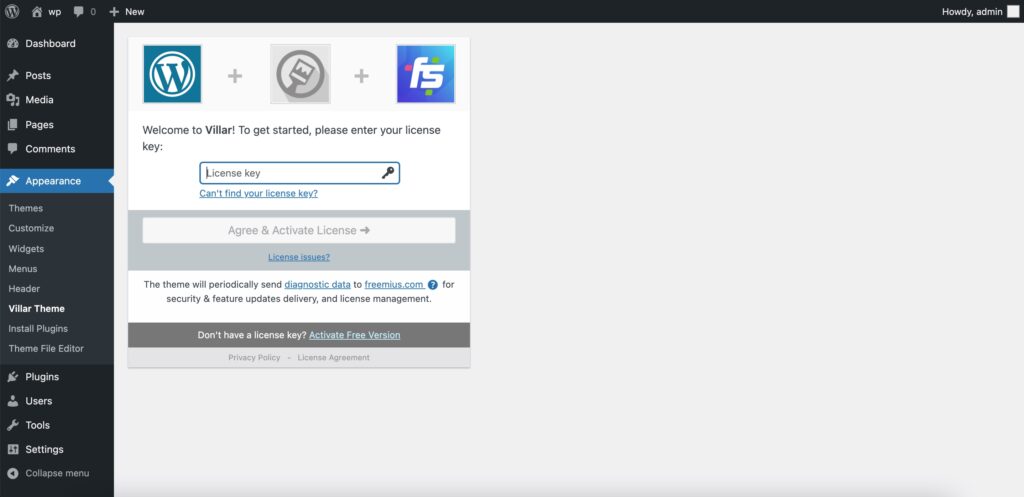
You can find your License Key from our members dashboard. Then enter your License Key and click “Agree & Active License”, after active your license your can use all pro features.
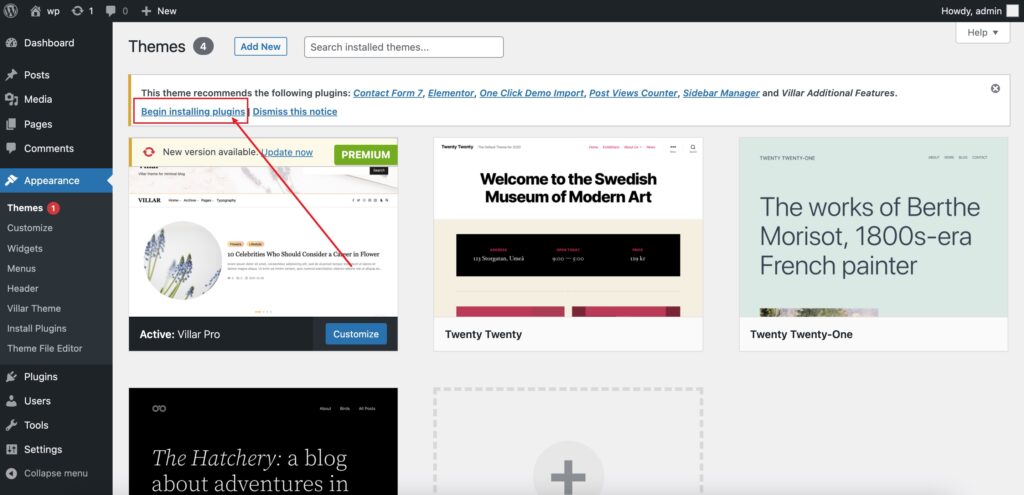
1.6 Install Recommended Plugins
The theme is now activated. You should now install and activate the recommended plugins by clicking on the Begin installing plugins link.
1.7 Plugins Installation
If you want to have a website that looks the same as our demo site (Pro Only), then you need to install all the plugins we recommend. Otherwise, you can choose the appropriate plugins according to your needs.
Villar Additional Features (Pro Only): This plugin provides a set of additional features for the Villar theme. We strongly recommend you to install this plugin.
Contact Form 7: Contact Form 7 can manage multiple contact forms, plus you can customize the form and the mail contents flexibly with simple markup. The form supports Ajax-powered submitting, CAPTCHA, Akismet spam filtering and so on.
Elementor: A WordPress website builder, with no limits of design. A website builder that delivers high-end page designs and advanced capabilities, never before seen on WordPress. The Villar theme uses elementor to provide flexible page layouts. If you don’t use elementor, we also provide widget-based layouts.
One Click Demo Import: You can use this plugin to import the demo site data we provide with one click.
Post Views Counter: Post Views Counter allows you to display how many times a post, page or custom post type had been viewed with this simple, fast and easy to use plugin.
Sidebar Manager: This plugin allows you to create new sidebars and display them conditionally on certain locations of the website easily. Once the sidebar is created and displayed on pages you like, you can add relevant widgets in it.
In addition to the above, if you want to create an e-commerce site or import our e-commerce demo site data, you will need to manually install the WooCommerce plugin.
After you select the appropriate plugins, then select “Install” from the dropdown menu. Click on the “Apply” button to continue the installation.
1.8 Installation Complete
After the installation is complete, click the “Return to Required Plugins Installer” link.
1.9 Plugins Activate
Select all plugins and select “Activate” from the dropdown menu. Click on the “Apply” button to continue the activation.
1.10 Classic Editor & Classic Widgets
By default wordpress uses the block editor and since WordPress version 5.8, the block editor is also available on the Widgets page and in the Customizer (Appearance > Widgets, Appearance > Customize > Widgets).
This theme works well with both editors, so choose the one you like.
If you want to use classic editor or classic widget, you need to manually install the plugin to enable it.
Installing by FTP
If you have any problems with installing the theme from the WordPress Dashboard (for example, you see this error: “The uploaded file exceeds the upload_max_filesize directive in php.ini”), then you need to install it via FTP.
To do this, you need to upload non-zipped theme folder called villar to /wp-content/themes/ folder in your WordPress installation folder on your server.
Next, login to your WordPress admin page and activate the theme (Appearance > Themes).
After the successful activation, see Step 1.5 of this documentation.